 EN

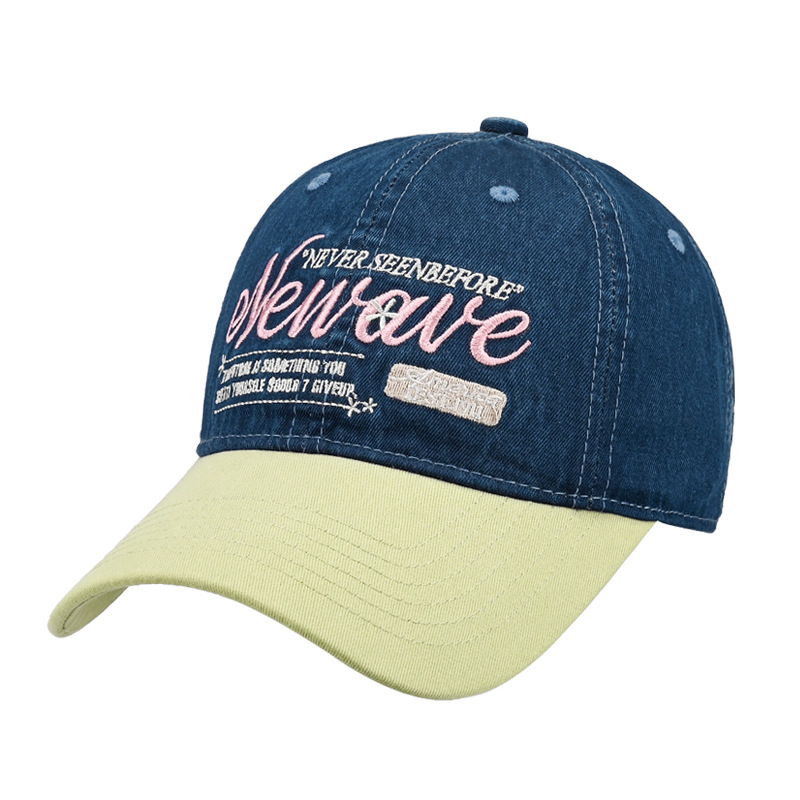
A quality cap is more than just an accessory—it's an investment in your personal style and comfort. Whether you wear a baseball cap daily for work, sport, or leisure, proper maintenance ensures your cap stays looking fresh, maintains its shape, and lasts for years. Many cap owners don't realize that incorrect cleaning methods can fade colors, damage the bill, or shrink the fabric. By learning how to care for your cap correctly, you can preserve its original appearance and structural integrity while maximizing its lifespan. This comprehensive cap care guide walks you through every step of cleaning, drying, and storing your cap like a true professional.

Professional cap maintenance begins with understanding the specific materials used in your cap and the cleaning methods that work best for each type. Cotton caps require different care than performance-blend fabrics, and vintage or embroidered caps demand extra attention. Regular maintenance not only keeps your cap hygienic and odor-free but also prevents permanent staining and material breakdown. By implementing a consistent cap care routine, you'll notice your cap maintains its color vibrancy, retains its fitted shape, and resists the wear and tear that comes from everyday use.
Understanding Your Cap Before Cleaning
Identifying Cap Materials and Fabric Types
The foundation of proper cap care begins with knowing exactly what your cap is made from. Most baseball-style caps feature a cotton or cotton-blend exterior, while performance-oriented caps often use polyester or moisture-wicking synthetic materials. Structured caps have reinforced bills and panels that require gentler handling, whereas unstructured caps are more forgiving during washing. Understanding whether your cap has embroidery, leather trim, or other delicate accents is crucial because these elements may need specialized cleaning approaches. Before you clean your cap for the first time, check the manufacturer's tag for specific care instructions—this personalized guidance often contains material percentages and recommended washing methods that apply directly to your specific cap.
Checking the Cap's Current Condition
Inspect your cap thoroughly before cleaning to identify stains, wear patterns, or areas requiring pre-treatment. Look for sweat marks inside the cap's inner lining, dirt accumulation on the bill, or stubborn stains on the crown. Gently touch the embroidery or logos to ensure they're securely stitched and won't loosen during washing. Check the cap's bill for any warping, as this affects how you'll handle the cap during drying. This pre-cleaning assessment helps you determine whether your cap needs a gentle hand wash, a machine wash on delicate settings, or targeted spot treatment for specific problem areas. Taking five minutes to evaluate your cap's condition prevents you from using overly aggressive methods that might damage weak points.
Step-by-Step Cap Cleaning Methods
Hand Washing Your Cap the Right Way
Hand washing is the safest cap cleaning method for most caps, especially vintage, embroidered, or heavily structured models. Fill a sink or basin with cool water and add a small amount of mild detergent designed for delicate fabrics—avoid bleach or harsh cleaners that can fade colors or weaken the material. Submerge your cap and gently work the soapy water through the fabric using your fingers, paying special attention to the sweat band and any visibly soiled areas. For stubborn stains, create a gentle paste with the detergent and water, then softly rub the affected spot with an old toothbrush. Rinse your cap thoroughly under cool running water until all soap residue is gone, as leftover detergent can leave white marks and attract dirt faster. Never wring or twist your cap during washing, as this stretches the fabric and distorts the cap's shape permanently.
Machine Washing When Appropriate
Some modern caps made from durable synthetic materials can tolerate machine washing if done carefully and with proper settings. Use a mesh garment bag to protect your cap during the machine wash cycle, which reduces friction and prevents direct agitation against the drum. Select the delicate or hand-wash cycle with cold water and use only a half-dose of mild detergent to minimize color fading and fabric stress. Never use hot water when washing a cap, as heat causes shrinkage and can melt certain synthetic materials used in modern caps. Machine washing should only be reserved for caps without embroidery, delicate trim, or structured elements that require gentler handling. After the cycle completes, remove your cap immediately to prevent mildew and begin the proper drying process without delay.
Drying, Shaping, and Storing Your Cap
Drying Your Cap Without Damage
Proper drying is where many people accidentally ruin their cap by using heat sources or aggressive methods that distort the shape. Never place your cap in a dryer, as high heat permanently shrinks fabric and can melt synthetic materials or damage embroidery. Instead, gently squeeze out excess water with a soft towel, then shape your cap properly before air drying. The most effective cap drying technique involves placing your cap on a clean, dry towel with the crown facing up and the bill lying flat, which allows air to circulate naturally around all surfaces. Alternatively, you can use a cap-shaped drying form—a specialized tool that maintains your cap's exact form while air drying indoors at room temperature. Direct sunlight accelerates fading, so always dry your cap in a shaded, well-ventilated area, not on a sunny windowsill. Your cap should dry completely within 24 to 48 hours depending on humidity levels and material type.
Long-Term Storage and Shape Maintenance
Once your cap is completely dry, store it properly to maintain its shape and prevent wrinkles or permanent creasing. Avoid storing your cap in plastic bags or airtight containers, which trap moisture and create conditions for mold and mildew growth inside the cap. Instead, use a cap display rack, hat stand, or cedar-lined storage box that allows airflow and protects your cap from dust. Store your cap in a cool, dry location away from direct heat, humidity, and strong light sources that fade colors over time. If shelf space is limited and you must stack caps, place acid-free tissue paper between each cap to prevent color transfer and protect the fabric. Regular inspection every few months ensures your stored cap remains in excellent condition and ready to wear whenever needed.
FAQ
How often should I clean my cap?
The frequency of cap cleaning depends on how often you wear it and the environmental conditions you expose it to. If you wear your cap daily in hot weather, sweat accumulation warrants washing every two weeks. For casual wear in temperate conditions, cleaning your cap once monthly maintains hygiene and prevents odor buildup. Light-use caps worn occasionally can be cleaned quarterly or only when visibly soiled. Always spot-clean sweat stains on the inner band between full cleanings to extend the time between thorough washes and reduce overall wear on the cap.
Can I use bleach or harsh chemicals to clean my cap?
No—bleach and harsh chemical cleaners should never be used on your cap because they cause permanent discoloration, weaken fabric fibers, and destroy embroidery or logos. Even diluted bleach solutions can create yellow or white spots that ruin the cap's appearance forever. Stick to mild detergents specifically formulated for delicate fabrics, or use natural cleaning solutions like white vinegar and baking soda for eco-friendly cap maintenance. Always test any cleaning solution on an inconspicuous area of your cap first to ensure it won't damage colors or materials.
What should I do if my cap shrinks after washing?
If your cap shrinks despite careful washing, immediate action offers the best chance of restoration. While the cap is still slightly damp, gently stretch it back to its original size using your hands and a cap-shaped form if available. Allow it to air dry completely while held in the stretched position to help set the new shape. For significant shrinkage, soak the cap in cool water mixed with a small amount of fabric softener for 15 minutes, then repeat the gentle stretching and air-drying process. Prevention remains better than remedy—always use cool water, never hot, and follow the manufacturer's care instructions to avoid shrinkage altogether.